
How Do You Make Cute DIY Jewelry with Mixed Bead Kits?
You make cute DIY jewelry with a mixed bead kit by picking a color story from the assortment, stringing the beads in a simple pattern, and finishing the ends with a knot or clasp, and most beginners finish a first bracelet in under an hour. The kit bundles several bead styles in one box, so you can design without shopping bead by bead. A basic bracelet needs only beads, stringing material and a way to close it.
This kind of DIY jewelry for beginners suits total newcomers, kids working with an adult, and crafters who want quick results. At Popcornshop, we believe little beads can bring big joy. Bright colors, playful details and the fun of making something that is truly yours all fit on one small cord.

By the end, you will know how to plan, string and finish a bracelet or necklace on your own. These handmade jewelry projects forgive mistakes, too. Even dropped, jumbled beads can turn into a happy, random-mix bracelet, so no spill ruins the fun.
Choose Beginner Jewelry Making Supplies for a Simple Start
Your first bracelet needs only five things, and you can lay them all out on one dish towel. The right beginner jewelry making supplies are beads, stretch cord, beading wire, clasps and a few basic tools. Here is the short list we suggest for jewelry making for beginners:
- A mixed bead kit with several bead finishes
- Stretch cord, about 0.8-1 mm thick
- Flexible beading wire with crimp beads
- Clasps with an extension chain
- Flat-nose pliers, crimping pliers and wire cutters
Stretch cord of about 0.8-1 mm suits most slip-on bracelets, while beading wire with a clasp suits necklaces. A crimp bead is a tiny metal tube you flatten with pliers to lock beading wire in place next to a clasp. A bead mat or tray keeps everything from rolling away.

Gather beads, stringing materials, clasps, and basic tools
The best beading kits for adults give you many bead finishes and sturdy stringing material, not just a huge piece count. Good bead bracelet kits for adults mix larger beads with small spacers, which makes patterns look neat. DIY bead kits with only one bead size tend to look flat.
Seed bead kits for beginners take more patience. Seed beads usually run 2-4 mm, so the 2 mm ones need a fine needle or a stiff cord end. Plan on slower work if your kit leans on these tiny beads.
Use clear instructions when learning bead stringing techniques
Follow clear written steps or a short video for your first clasp. Bead stringing techniques look easy, but a crimp is simple to get wrong the first time. Watching someone squeeze one helps a lot.
A common slip is buying beading wire without crimp beads. Wire with no crimps has no way to hold a clasp, so add them to your DIY jewelry supplies. Check that your cord fits through the smallest bead hole in your kit before you cut any length.
How Mixed Bead Kits, Beads for Jewelry Making, and Glass Glaze Beads Work Together
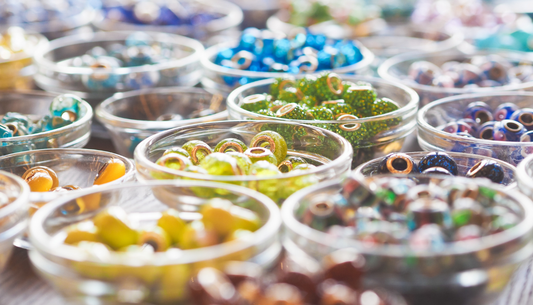
Think of your kit like a paint box: solid beads lay the base color, while shimmer, sparkle and texture come from the other finishes. In mixed bead kits, each bead type does a different job in one design. Popcornshop mixed bead kits combine solid-color beads, iridescent AB beads, faceted beads, crackle beads and assorted pendants.
A common balance rule helps you use them well. Pick one focal element, two to three main colors and neutral spacers. That simple mix keeps a bracelet cheerful instead of crowded.

Combine solid-color beads, iridescent AB beads, faceted beads, and crackle beads
Solid-color beads form the base of most designs. Iridescent AB beads add shimmer, since their rainbow coating looks like an oil slick in the light. Faceted beads have cut flat sides that catch light and sparkle as you move.
Crackle beads bring texture with their cracked-ice inner look. The best mixed bead kits give you all these beads for jewelry making in one box. That variety lets a single kit cover sweet, bold and beachy styles.
Balance bead colors, sizes, shapes, and assorted pendants
A pendant works as the focal point, so place it where the eye lands first. Then build out with your main colors and keep spacers neutral. Mix round beads with a few faceted ones so the shapes do not all match.
The biggest mistake is using every finish at once. Shimmer, sparkle and texture all together looks busy. Pick two finishes per piece and save the rest for your next design.
Use Popcornshop collections to create personalized jewelry designs
Popcornshop glass glaze beads add a glossy accent to any piece. Our glass glaze bead collections give you more colors to mix with your kit. One glossy bead between two solid ones can lift a whole bracelet.
Make it personal with your favorite colors or a birthstone shade. A deep red for January or a soft blue for March turns a bracelet into a gift with meaning. Lay a mixed row on your mat and remove one finish if your eye has no place to rest.
How to Make Beaded Jewelry with a Simple Stringing Process
Lay your whole pattern out in a bead tray before a single bead touches the cord, since rearranging on the mat takes seconds and re-stringing takes minutes. Learning how to make beaded jewelry comes down to six steps, done in order. The planning step saves the most time.
Start with size. An average adult wrist is about 6-7 inches, so a bracelet usually measures wrist size plus about 0.5-1 inch. Common necklace lengths are about 16 inches for a choker and 18 inches for a princess length.
Plan a bead pattern before stringing your design
Beading kits and patterns help a beginner by mapping a simple repeat, such as AB-solid-solid-AB. A repeat keeps your layout even without much thought. Good bead pattern ideas start small and grow from there.
Center your focal bead first, then build out in both directions. Count the beads on each side so they match. Your piece will hang straight instead of sliding to one side.
String beads for a bracelet or necklace with an even layout
Follow this easy beaded bracelet tutorial for any first piece. The same order works for a necklace, too, with wire in place of cord.
- Measure your wrist or neck and add the extra length.
- Plan the pattern on your mat.
- Cut the cord with 3-4 inches extra for knotting.
- Pre-stretch elastic cord by pulling it gently a few times.
- String the beads with a bead stopper or clip on the end.
- Knot or crimp the ends and add a clasp.
One of the best bead stringing tips is the clip on the end. It stops beads from sliding off while you work. Without it, one bump can undo ten minutes of stringing.
Attach clasps and extension chains with basic jewelry finishing techniques
Stretch cord needs a surgeon's knot, which is a square knot with one extra twist. A dab of clear glue on the knot adds security. Let the glue dry fully before you wear the piece.
For wire, slide on a crimp bead, loop through the clasp and squeeze the crimp flat. An extension chain on the other end gives you adjustable length. These jewelry finishing techniques take a few tries to master. Tuck the knot inside a bead with a larger hole so it stays hidden and protected from rubbing.
Cute DIY Jewelry Ideas for Bracelets, Necklaces, and Charms
A three-bracelet stack in one color family is the quickest cute project, and you can make it from a single kit. Pick pinks, blues or greens and make each bracelet a little different. Here are five beaded bracelet ideas and more to try next:
- Pastel stack bracelets
- Rainbow AB friendship set
- Statement necklace with a focal pendant
- Star and moon layered anklet
- Transparent bead bag charm
Never hang heavy glass pendants on thin stretch cord, since the weight pulls it loose fast. Bead color combinations like pastel plus gold or ocean blues plus clear always look sweet. They work on bracelets, necklaces and charms alike.
Create colorful beaded bracelets with mix-and-match beads
Seed beads suit stacked friendship bracelets, since thin strands layer well. Make a rainbow AB set with one shimmer bead every few inches. Wear three together or share them with friends.
Mix and match bead sizes between strands for a fun stack. One chunky strand next to two thin ones looks balanced. Keep the colors close so the set still looks planned.
Design beaded necklaces with larger focal beads and pendants
For beaded necklace ideas, start with one large focal pendant in the center. Acrylic beads are lighter than glass beads, which helps chunky necklaces sit comfortably. A bold acrylic strand will not pull on your neck all day.
Add a few glass beads near the pendant for gloss. Use beading wire and a clasp for any necklace with real weight. Heavier pieces need wire, not elastic.
Try charm jewelry making with glass beads, acrylic beads, and transparent beads
Charm jewelry making goes well beyond bracelets. Star and moon charms suit layered anklets, and mixed beads also work for keychains, bag charms and phone charms. Transparent beads let light through and pair well with AB finishes.
A beading kit can even serve embroidery projects. Sew seed beads onto denim or a tote for a sparkly patch. Make matching pieces for a friend, since a twin set takes only a few extra beads.
Beginner Jewelry Making Tips for Better-Fitting, More Personal Designs
Most beginner bracelets end up too tight, so measure your wrist first and then add the extra length on top. Use a soft tape or a strip of paper wrapped around your wrist. Leave a little ease so 1-2 fingers slip under the finished bracelet.
These beginner jewelry making tips fix the DIY jewelry mistakes we see most often:
- Measure before cutting any cord.
- Test the fit before the final knot.
- Don't overstretch elastic while stringing.
- Add one personal touch, like an initial or favorite color.
Skipping the pre-stretch is a sneaky mistake. Unstretched cord sags after a few days, and your snug bracelet turns loose. A few gentle pulls before stringing keep the size you planned.
Personalized beaded jewelry is what makes a piece feel special. A single initial bead or a favorite shade turns a simple strand into unique DIY jewelry. Your friends will know it came from you.
Care matters as much as fit. Store your beads in a divided box so the finishes do not scratch each other. AB coatings and glossy glass stay bright much longer that way.
At Popcornshop, we believe little beads bring big joy, and handmade beaded jewelry proves it every time. Explore our mixed bead kits and glass glaze bead collections to find colors that feel like you. Pick one Popcornshop mixed bead kit, choose three colors you love, and make your first stack this weekend.
FAQ
What size beads are best for beginners?
Beads of 6-8 mm are the easiest size for beginners to handle. They are big enough to pick up with your fingers and have holes that take cord without a needle. Seed beads of 2-4 mm look lovely, but they need more patience and steady hands. Start with medium beads, then add tiny ones once your stringing feels smooth.
Can kids use mixed bead kits?
Yes, kids can use mixed bead kits with an adult watching the younger ones. Small beads are a choking hazard for children under 3, so keep kits out of reach of toddlers. Older kids do best with larger beads and stretch cord, since knotting is easier than crimping. Working on a tray also keeps loose beads off the floor.
What's the difference between glass and acrylic beads?
Glass beads are heavier and glossier, while acrylic beads are lighter and more budget-friendly. Glass gives a rich shine and a nice weight on the wrist. Acrylic works best for chunky pieces, where glass would feel heavy. Many makers mix both, using acrylic for size and a few glass beads for a polished, shiny accent.
How long does elastic bead cord last?
Elastic bead cord usually lasts for months with gentle wear. Pre-stretching it before stringing helps it keep its shape over time. Avoid rolling the bracelet on and off your hand, since that strains the cord. Lotion, pool water and heat can also wear it down faster, so take bracelets off before swimming or showering.
Do I need a clasp for a beaded bracelet?
No, a stretch cord bracelet only needs a knot to close. It slides over your hand, so a clasp is not necessary. Beading wire is different, because it does not stretch at all. Wire needs crimp beads and a clasp to open and close, which makes it a better match for necklaces and fitted bracelets.
How do I keep stretch bracelet knots from coming undone?
Use a surgeon's knot, add a dab of clear glue, and hide the knot inside a bead. The surgeon's knot grips better than a plain knot because of its extra twist. Glue seals it in place once dry. Trim the tails close, but not flush, so the knot has a little room to settle.
What are AB beads?
AB beads have an aurora borealis coating that gives them a rainbow shimmer. The name comes from the northern lights, which show similar shifting colors. The coating sits on the bead surface, so it changes color as light hits it from different angles. AB beads look extra bright next to clear or transparent beads in a design.